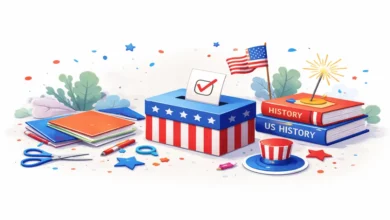
20 Creative Presidents’ Day Craft Ideas for Kids
Disclosure: As an affiliate, I may earn a commission from qualifying purchases made through my links at no extra cost to you.

Presidents’ Day is a wonderful opportunity to introduce children to the history, symbols, and values that shape the United States. While the holiday originally began as a celebration of George Washington’s birthday, it has evolved into a day that honors all those who have served in the nation’s highest office. Engaging kids in hands-on activities is one of the most effective ways to make these historical concepts tangible and memorable.
Crafting allows children to explore patriotic themes like leadership, freedom, and national symbols through color, texture, and creativity. These activities are designed to be accessible to various age groups, using common household or classroom materials to ensure the focus remains on fun and learning.
In this guide, you will find 20 detailed craft ideas ranging from simple paper collages to more intricate decorative projects. Each activity emphasizes patriotic imagery such as the stars and stripes, the White House, and national monuments to help children connect with the spirit of the holiday in an age-appropriate way.
1. American Flag Paper Collage
The American flag is the most recognizable symbol of the United States. This craft focuses on the flag’s geometry, helping children understand the arrangement of the thirteen stripes and the blue canton. By using torn or cut paper, kids develop fine motor skills while learning about the significance of the red, white, and blue.
This project is excellent for younger children because it does not require precise drawing. The focus is on the composition of shapes and colors to create a recognizable representation of the national flag.
What You’ll Need
- Red, white, and blue construction paper
- Glue sticks or school glue
- Safety scissors
- A large sheet of white cardstock for the base
Step-by-Step Guide
- Cut or tear the red and white paper into long, thin strips.
- Cut a small blue square for the top left corner of the flag.
- Glue the blue square onto the white base sheet.
- Alternate gluing the red and white strips horizontally across the page, starting with a red strip at the top.
- Cut small white stars or circles and glue them onto the blue square.
2. Stars & Stripes Handprint Art
Handprint art is a tactile way for children to create a personalized piece of patriotic decor. This version focuses strictly on the pattern of the flag, using the child’s hand as the “stamp” to create the stripes and the star field. It is a messy but rewarding sensory experience.
Because this craft uses the natural shape of the hand, every flag created is unique to the child. It serves as a great keepsake to look back on as the child grows.
What You’ll Need
- Red, white, and blue washable tempera paint
- Large sheets of heavy paper or canvas
- Paintbrushes or sponges
- Water and towels for cleanup
Step-by-Step Guide
- Paint the palm and fingers of the child’s left hand with blue paint and press it into the top left corner of the paper.
- Clean the hand thoroughly.
- Paint the fingers (excluding the thumb) with red paint.
- Press the red fingers horizontally across the paper to create the stripes of the flag.
- Leave white space between the red handprints to represent the white stripes.
- Once dry, use a fingertip dipped in white paint to add “stars” over the blue palm print.
3. Presidents’ Day Hat
Top hats are often associated with historical American leaders. This craft allows children to build their own patriotic headwear using simple construction paper techniques. The design focuses on the iconic tall shape decorated with national colors.
The hat is a fun prop for role-playing or for wearing during a Presidents’ Day lesson. It helps children visualize the formal attire often seen in historical portraits.
What You’ll Need
- Black or blue construction paper
- Red and white paper for decorations
- Tape or stapler
- Scissors and glue
Step-by-Step Guide
- Roll a large sheet of black or blue paper into a cylinder that fits the child’s head and secure it with tape.
- Cut a large circle out of the same color paper to act as the brim, then cut a smaller hole in the center to fit the cylinder.
- Attach the brim to the bottom of the cylinder using tape or glue tabs.
- Cut strips of red and white paper and glue them around the base of the cylinder as a decorative band.
- Add paper stars to the band for an extra patriotic touch.
4. Liberty Bell Craft
The Liberty Bell is a powerful symbol of American independence and freedom. This craft uses everyday materials like paper plates or cardboard to recreate the bell’s famous silhouette, including the iconic crack that makes it so recognizable.
This project provides a great opportunity to discuss the history of Philadelphia and the role the bell played in the founding of the nation. It is a simple shape-based craft that yields a high-impact visual.
What You’ll Need
- Yellow or gold construction paper (or a painted paper plate)
- Brown marker or crayon
- String or yarn
- Scissors and glue
Step-by-Step Guide
- Draw a bell shape on the gold paper or cardboard and cut it out.
- Use a brown marker to draw a jagged line down the center to represent the famous crack.
- Cut a small circle or “clapper” for the bottom of the bell and attach it with a short piece of string.
- Punch a hole at the top of the bell and thread a loop of yarn through it for hanging.
5. White House Pop-Up Card
The White House is one of the most famous buildings in the world. Creating a pop-up card allows children to explore basic architecture and 3D paper engineering. The focus is on the pillars and the symmetrical design of the executive mansion.
This craft is slightly more advanced, making it perfect for elementary-aged children who are beginning to experiment with spatial concepts.
What You’ll Need
- White and blue cardstock
- Scissors
- Ruler
- Markers or colored pencils
Step-by-Step Guide
- Fold a piece of blue cardstock in half to create the card base.
- Cut two parallel slits into the folded edge of the card to create a “tab.”
- Push the tab inward so it stands up when the card is opened.
- Cut a rectangle out of white paper and draw columns and windows to represent the White House.
- Glue the White House drawing onto the standing tab.
6. Presidents’ Day Word Art Poster
Language is a key part of leadership. This project encourages children to think about the values associated with the presidency, such as “honesty,” “courage,” and “freedom.” By turning these words into art, kids engage with the vocabulary of citizenship.
The poster can be customized with various fonts, colors, and layouts, making it a flexible project for different skill levels.
What You’ll Need
- Large poster board or paper
- Markers, crayons, or colored pencils
- Letter stencils (optional)
- Ruler
Step-by-Step Guide
- Brainstorm a list of words related to the presidency and the USA.
- Use a pencil to lightly sketch the words in different sizes and orientations across the poster.
- Trace over the words with red, white, and blue markers.
- Fill in the background with small stars or stripes to complete the design.
7. Patriotic Paper Chain
Paper chains are a classic decoration for any holiday. For Presidents’ Day, the red, white, and blue theme reinforces the national colors. This is a great group activity where multiple children can link their chains together to decorate a room.
This craft is excellent for practicing repetitive patterns and improving manual dexterity through looping and stapling.
What You’ll Need
- Red, white, and blue construction paper
- Stapler or tape
- Scissors
Step-by-Step Guide
- Cut the colored paper into strips of equal width and length (roughly 1 inch by 8 inches).
- Create a loop with the first strip and staple the ends together.
- Thread the second strip through the first loop and staple its ends.
- Continue the process, alternating colors in a consistent pattern (Red, White, Blue).
8. Coin Rubbing Art
Many American presidents are featured on U.S. currency. Coin rubbing is a fascinating way for kids to see the details of these portraits and the symbols on the back of the coins. It combines art with a basic lesson in numismatics.
This activity is very simple and requires only a few household items, making it an easy “rainy day” project for the holiday.
What You’ll Need
- Various U.S. coins (pennies, nickels, dimes, quarters)
- Thin white paper
- Crayons (with the paper sleeves removed)
Step-by-Step Guide
- Place the coins on a flat surface, arranged in a pattern.
- Lay the thin white paper over the coins.
- Using the side of a crayon, gently rub over the area where the coins are located.
- Watch as the image of the president or the national symbol appears on the paper.
9. Stars Mobile
A mobile is a dynamic craft that adds movement to a room. Using stars in patriotic colors, children can create a hanging display that celebrates the “star-spangled” nature of the American flag.
This project teaches balance and coordination as children decide where to hang each star to keep the mobile level.
What You’ll Need
- Cardstock in red, white, and blue
- String or fishing line
- A clothes hanger or two wooden dowels
- Hole punch
Step-by-Step Guide
- Cut out several stars of different sizes from the cardstock.
- Use a hole punch to make a small hole at the top of each star.
- Tie varying lengths of string to each star.
- Tie the other end of the strings to the hanger or dowels, spacing them out evenly.
10. Presidents’ Day Crown
Many children enjoy wearing crowns, and this version uses patriotic motifs to celebrate the leadership aspect of the holiday. Instead of jewels, this crown is adorned with stars and stripes.
This is a high-energy craft that encourages imaginative play. Kids can “preside” over their own pretend meetings or ceremonies once the crown is complete.
What You’ll Need
- Blue construction paper
- Star stickers or paper cutouts
- Red and white markers
- Stapler
Step-by-Step Guide
- Cut a long strip of blue paper that is wide enough to wrap around a child’s head.
- Cut a zigzag pattern along the top edge to create the “peaks” of the crown.
- Decorate the peaks with stars and the base with red and white stripes.
- Wrap the strip around the child’s head to measure the fit, then staple the ends together.
11. Mount Rushmore Silhouette Craft
Mount Rushmore is a massive monument carved into the Black Hills of South Dakota. This craft focuses on the grand scale of the mountain by creating a silhouette of the rock formation. By stripping away the detail of the faces, kids focus on the iconic skyline of the monument.
This project is a great way to introduce the concept of “monuments” and why we build them to remember important figures.
What You’ll Need
- Grey or brown construction paper
- Black or dark blue background paper
- Scissors and glue
- Chalk or light-colored pencils for highlighting
Step-by-Step Guide
- Look at a photo of Mount Rushmore and draw a simplified bumpy outline of the mountain on grey paper.
- Cut out the silhouette.
- Glue the grey mountain shape onto the bottom half of the dark background paper.
- Use chalk to add light “cracks” or “ridges” to the mountain to give it a rocky texture.
12. USA Map Coloring Craft
Understanding the geography of the country is a fundamental part of learning about the presidency. This craft involves coloring a map of the United States, which helps children visualize the vast area that a president leads.
This can be used as an educational tool to point out where different presidents were born or where the capital is located.
What You’ll Need
- Printed outline of the USA map
- Colored pencils or markers
- Star stickers
Step-by-Step Guide
- Use red, white, and blue to color the different states on the map.
- Place a star sticker over Washington, D.C. to identify the capital.
- Color the surrounding oceans blue to distinguish the land from the water.
13. Patriotic Windsock
Windsocks are functional crafts that react to the environment. When hung outside or near a window, the streamers catch the breeze, creating a festive look. This project uses a cylindrical base to represent the unity of the states.
This is a visually striking craft that is very easy for younger children to assemble with minimal help.
What You’ll Need
- Blue cardstock or a clean tin can (with safe edges)
- Red and white crepe paper or ribbons
- Glue or tape
- String for hanging
Step-by-Step Guide
- Roll the blue cardstock into a tube and secure it.
- Decorate the blue tube with white star stickers.
- Glue long strips of red and white crepe paper to the bottom inside rim of the tube.
- Attach a string to the top of the tube so it can be hung up.
14. Freedom Torch Craft
The torch is a symbol of enlightenment and freedom, most famously held by the Statue of Liberty. This craft allows kids to build a 3D model of a torch, representing the light of liberty that presidents are tasked with protecting.
The use of tissue paper for the flame gives the craft a vibrant, flickering appearance that kids find very appealing.
What You’ll Need
- Cardboard tube (from paper towels or toilet paper)
- Yellow, orange, and red tissue paper
- Gold or silver paint (or aluminum foil)
- Glue
Step-by-Step Guide
- Paint the cardboard tube gold or wrap it in aluminum foil to create the handle.
- Cut several squares of red, orange, and yellow tissue paper.
- Layer the tissue paper and pinch it at the bottom to create a “flame” shape.
- Glue the pinched end of the tissue paper inside the top of the tube.
15. Bald Eagle Symbol Craft
The Bald Eagle is the national bird and a symbol of strength. This craft simplifies the eagle into its most recognizable components: the wings and feathers. By focusing on the texture of the wings, kids learn about the majesty of this national symbol.
This is a great craft for exploring different materials, such as real feathers or textured paper, to mimic the look of a bird.
What You’ll Need
- Brown and white construction paper
- Glue
- Scissors
- Large sheet of blue paper for the background
Step-by-Step Guide
- Cut out two large wing shapes from brown paper.
- Cut many small “feather” shapes from the white and brown paper.
- Glue the brown wings onto the blue background paper.
- Layer the white feathers at the top (to represent the eagle’s head area) and brown feathers on the wings.
16. Presidents’ Day Bookmark
Reading is a vital skill for any leader. Creating a custom bookmark encourages kids to pick up a book about American history. These bookmarks are decorated with patriotic symbols and can even feature famous presidential quotes.
This is a practical craft that children can use immediately in their schoolwork or personal reading.
What You’ll Need
- Rectangular strips of heavy cardstock
- Markers or pens
- Ribbon or tassels
- Hole punch
Step-by-Step Guide
- Decorate a strip of cardstock with red and white stripes or blue stars.
- Write a word like “Read,” “Lead,” or “Freedom” in the center.
- Punch a hole at the top of the strip.
- Thread a piece of ribbon through the hole and tie it in a knot.
17. Red, White & Blue Mosaic Art
Mosaic art is created by assembling small pieces of colored material to form a larger image. This technique is excellent for teaching patience and spatial awareness. For Presidents’ Day, a mosaic of the national colors creates a sophisticated, textured look.
The finished product often looks like a stained-glass window or a tiled mural, giving the kids a sense of accomplishment in creating “fine art.”
What You’ll Need
- Small scraps of red, white, and blue paper
- Glue sticks
- A pre-drawn shape (like a star or a shield) on a piece of paper
Step-by-Step Guide
- Collect small scraps of paper in the three national colors.
- Apply glue to a small section of the pre-drawn shape.
- Press the paper scraps into the glue, keeping colors grouped or mixing them as desired.
- Fill the entire shape until no white space remains.
18. Oval Office Door Craft
The Oval Office is the official workspace of the President. This craft recreates the famous door of the office, allowing kids to imagine what happens behind it. It is a symbol of the responsibility and the “open door” policy of a democracy.
Decorating the door with wreaths or flags makes it feel official and celebratory.
What You’ll Need
- Brown construction paper
- Yellow markers (for the “gold” handle)
- Small paper flags or stars
- Scissors and glue
Step-by-Step Guide
- Cut a large rectangle out of brown paper to represent the door.
- Draw a circle or a “knob” using a yellow marker.
- Draw panels on the door to give it a realistic architectural look.
- Glue small patriotic decorations, like stars or a tiny flag, to the center of the door.
19. Star-Spangled Banner Lyric Art
The national anthem is a poem set to music that tells the story of the American flag. This craft focuses on the text of the song, encouraging kids to engage with the lyrics. By decorating the words, the poem becomes a piece of visual art.
This activity is perfect for helping older children memorize the lyrics while expressing themselves artistically.
What You’ll Need
- A printed copy of the first verse of the “Star-Spangled Banner.”
- Watercolors or markers
- Star stickers
Step-by-Step Guide
- Print the lyrics in a large, clear font in the center of a page.
- Use watercolors to paint a light wash of blue and red over the text, ensuring it remains readable.
- Once dry, place star stickers around the border of the page.
- Frame the art with a construction paper border.
20. Presidents’ Day Badge or Medal
Medals are given to honor bravery and service. Kids can create their own “Leadership Medals” to celebrate the qualities they admire in a president. This circular craft is a great way to end a day of learning by rewarding the “leaders of tomorrow.”
Wearing the badge provides a sense of pride and connects the child to the concept of public service.
What You’ll Need
- Two paper circles (one blue, one white)
- Red and white ribbon
- Safety pin or tape
- Glue
Step-by-Step Guide
- Glue the smaller white circle onto the larger blue circle.
- Decorate the white circle with a star or the word “Leader.”
- Cut two short lengths of red and white ribbon and glue them to the bottom of the circles so they hang down.
- Use tape or a safety pin to attach the badge to the child’s shirt.
Presidents’ Day crafts provide a meaningful way for children to explore the history and symbols of the United States. By moving through these 20 projects, kids can build a deeper appreciation for the office of the presidency and the values of leadership and freedom. Whether they are making a simple paper chain or a detailed White House card, the process of creating helps cement these important historical concepts.